How to Measure a Room Properly: Step-by-step Guide
Accurate room measurements are indispensable for professionals like interior designers, architects, and DIY enthusiasts. Knowing a room’s dimensions enables precise space planning, material estimation, and cost projections. Yet, it’s not as simple as it seems.
The key to measuring a room properly is using a laser distance measure or tape measure, establishing reference points on the floor, taking multiple measurements, and accounting for irregular shapes and features.
This comprehensive guide covers indoor space measurement considerations, essential equipment, a step-by-step measurement process, and tips for avoiding common mistakes, ensuring successful projects and efficient space utilization.
Importance of Accurate Room Measurements
Measuring interior spaces precisely is important for several reasons:
- Accurately calculating square footage for real estate transactions like buying, selling or renting property.
- Determining accurate floor area to estimate cost per square foot for flooring installation or replacement.
- Purchasing the proper amount of materials needed for remodeling or construction projects.
- Planning space efficiently during interior design and choosing appropriately sized furnishings.
- Identifying the right size appliances, fixtures and equipment to fit the dimensions.
- Creating precise architectural drawings and floor plans for construction or renovation purposes.
- Maximizing every inch of space during space planning and layouts.
- Meeting code requirements and regulations for room sizes.
Careful and meticulous room measurement is clearly essential for both professionals and do-it-yourselfers carrying out any interior project or real estate transaction.
Key Considerations Before Measuring a Room
Before breaking out the tape measure, keep these tips in mind:
- Remove all furniture and obstructions from the room to open up space and take the most accurate measurements possible.
- Gather all the necessary measuring tools and supplies to have on hand.
- Determine which specific dimensions of the room you need – length, width, ceiling height, etc.
- Decide on the level of precision needed – eighths or sixteenths of an inch.
- Use a consistent unit of measurement, either imperial or metric, for all measurements.
- Record all measurements systematically using floor plans, labels, notes or measurement logs.
- Double check all measurements for accuracy before finalizing.
- Measure safely using ladders, helpers and appropriate gear as needed.
Following proper protocol from the start will set you up for success as you undertake measuring the space.
Tools and Equipment for Measuring a Room
Having the right gear on hand will make taking room measurements much easier and more precise. Standard equipment for accurately measuring indoor spaces includes:
Measuring Tape: The Essential Tool
A standard retractable measuring tape is a must-have for any interior project. Choose a durable measuring tape at least 25 feet long so you can measure wall lengths and diagonals without interruption.
Metal tapes are longest lasting. Get a tape measure with large, easy-to-read markings in increments down to 1/8 inch or 1/16 inch for precision.
Stand-out features like anti-slip coatings, finger stops and automatic retraction make tape measures even more user-friendly. Having multiple tape measures on hand ensures you always have one when needed.
Laser Distance Measurer: Accuracy and Efficiency
Laser distance measurers use laser technology to instantly measure distances up to 100 feet with the tap of a button.
The device sends a laser to a target surface and uses the reflection to calculate distance.
Laser measurers take single linear measurements or continuous measurements useful for irregular shapes.
Features like built-in inclinometers can measure angles and heights. This tool adds efficiency and accuracy to room measurement.
Digital Apps for Room Measurement
Digital measuring apps turn your smartphone or tablet into a measuring tool using augmented reality, artificial intelligence and computer vision technology.
Apps allow you to walk around a room and create a digital floor plan with precise room dimensions. Some apps even auto-calculate floor area as you map a space.
Safety Gear for Precision
A folding ladder or step ladder will be required to accurately measure wall heights and ceiling height. Choose the appropriate ladder height with a comfort step at the top for easy access.
Other safety essentials include a hard hat, protective eyewear and gloves. A helper is also useful for safety and precision when using ladders.
Having the right basic gear for the job will streamline the measuring process while also improving accuracy. Invest in quality tools for ongoing reliability.
Step-by-Step Guide to Measuring a Room Properly
With the right preparation and tools, you’re ready to start measuring. Follow this methodical room measurement process for accurate results:
Step 1: Start with the Basics- Length, Width and Height
The basic interior dimensions needed for any space are:
- Length – The room’s longest side wall to wall
- Width – The room’s shortest side wall to wall
- Height – Floor to ceiling
Measure these dimensions meticulously as the foundation for all other room measurement calculations:
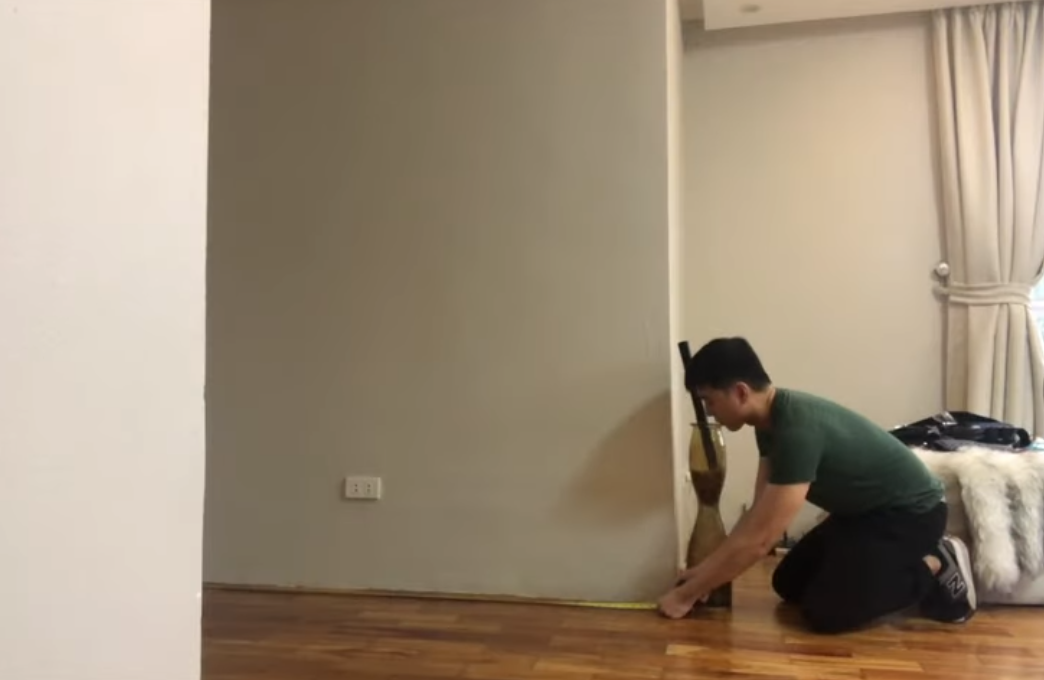
Measuring Wall Length
- Position your tape measure along the bottom edge of the longest wall. Keep the tape straight and tight.
- Note the starting point and endpoint of the wall length measurement.
- Record the measurement precisely based on unit and level of precision needed.
- Repeat at the top of the wall and average the two if walls are not square.
Measuring Wall Height
- Place a step ladder near the wall and safely climb to the top rung.
- Extend the tape measure from the floor to ceiling, holding it vertically straight.
- Read the tape carefully and record the measurement.
- Repeat at several points along each wall and average.
Calculating Ceiling Height
- Subtract the wall height from the total floor to ceiling height. This gives the ceiling height.
Step 2: Determining Square Footage
To find total floor area, multiply the length by width. Note square footage calculations must account for the units used:
Standard vs. Metric Measurement
- If using imperial feet and inches – multiply length x width both in feet.
- If using metric – multiply length x width both in meters.
Calculating Floor Area
- Carefully multiply the length and width measurements.
- Double check decimals are placed correctly based on units used.
- Record the total calculated square footage.
This total floor area will be important for flooring, furnishings and many other project needs.
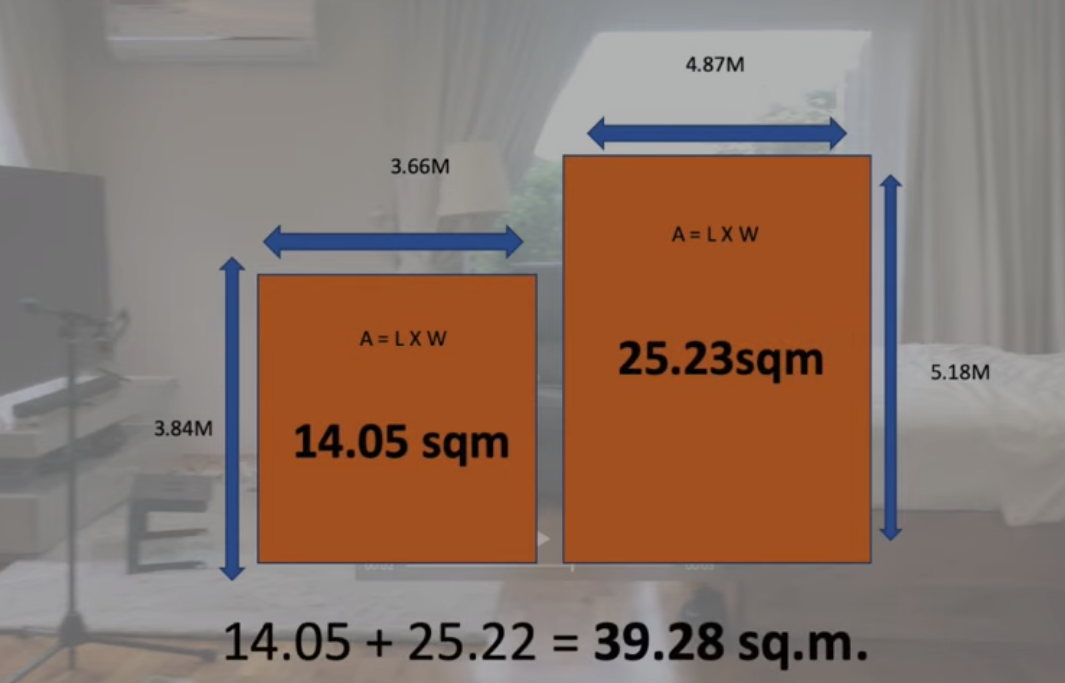
Step 3: Measuring Irregular Spaces
Rooms with angular features like bay windows require extra care when measuring:
Dealing with Angles and Nooks
- Break the space into geometric shapes.
- Measure the length and width of each shape.
- Calculate the area of each shape individually.
- Add all the shape areas together for the total.
Special Considerations for Bay Windows
- Measure the three sides of the bay window separately.
- Sketch the bay window area on your floor plan.
- Subtract the bay window area from the room’s total area.
Dividing irregular spaces into manageable shapes makes it easier to precisely measure the room.
Step 4: Calculating Perimeter for Wall Treatments
To determine linear perimeter for wallpaper, wainscoting, molding or painting, measure and add together the lengths of all the room’s walls:
- Carefully measure all 4 walls – the length and width sides.
- Add together all the wall length measurements.
- This total equals the room perimeter.
Knowing the exact perimeter is crucial for purchasing sufficient wall treatment materials.
Step 5: Measuring Doorways and Windows
Door and window measurements involve height, width and distance from corners:
- Measure height from floor to top trimming.
- Measure width including all side trimmings.
- Measure distance from nearest corner on each side.
Repeat for all doors and windows in the space.
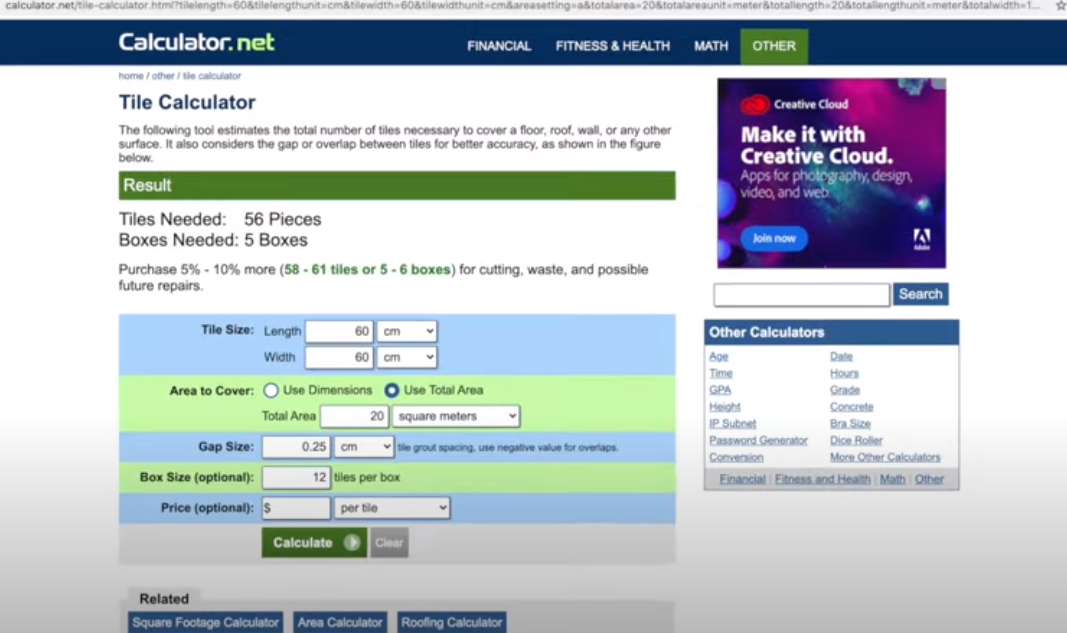
Step 6: Measuring for Flooring and Wall Coverings
For new floor or wall finishes, calculate materials needed based on room dimensions:
Factoring in Wastage
- Add at least 10% extra to your measurements to allow for wastage during installation.
Handling Patterned Materials
- Double the square footage calculated if installing tile or patterns.
By factoring in essential waste and pattern allowances, you can buy adequate flooring and materials.
Step 7: Recording and Organizing Measurements
With multiple precise room measurements in hand, proper documentation is key:
Creating a Floor Plan
- Sketch a simple floor plan and record measurements in appropriate locations.
- Alternatively, use floor planning software or apps to neatly diagram the space.
Using Software and Apps for Documentation
- Dedicated measurement recording apps help log dimensions.
- Spreadsheet software also lets you systematically record data.
Labeling and Annotating Measurements
- Clearly label each measurement on the floor plan or log sheet.
- Provide any clarifying notes on measurement locations.
Thoroughly documenting and organizing room measurements provides a helpful reference for current and future projects.
Common Mistakes to Avoid When Measuring a Room
Accurate room measurement depends on avoiding some key mistakes:
Not Double-Checking Measurements
- Fail to verify measurements, risking transcription errors.
- Always re-measure and double check recorded dimensions.
Neglecting to Factor in Trim and Molding
- Forgetting baseboards and crown molding will throw off calculations.
- Measure to the actual wall or floor surface inside any trim.
Overlooking Obstructions and Fixtures
- Work around in-wall cabinets, radiators and other fixtures.
- Make notes on measurements that miss permanent obstructions.
Stay diligent to sidestep these common stumbling blocks during the measuring process.
Practical Applications of Accurate Room Measurements
Precision room measurement supports various residential and commercial projects:
Interior Design and Furniture Layout
- Plan furniture placement for optimal fit and function.
- Determine requirements for draperies and window treatments.
Estimating Material Requirements for Renovations
- Calculate supplies needed – flooring, paint, lighting, tiles, etc.
- Identify appropriate sizes for new appliances or fixtures.
Ensuring Proper Fit for Appliances and Fixtures
- Specify accurate dimensions for cabinetry, vanities and shelving.
- Choose correctly sized HVAC systems and ductwork.
DIY and Home Improvement Projects
- Buy precise amounts of materials from framing to finishes.
- Rent equipment that fits through doors and openings.
Accurate room measurement is truly fundamental for both professionals and avid DIYers.
Frequently Asked Questions
In this FAQ section, we address essential tools and techniques for measuring a room accurately, including handling uneven walls and calculating irregular room areas.
What Tools Do I Need To Measure A Room?
You’ll need a tape measure, laser distance measurer, telescoping rod for ceilings and a pencil and paper for recording dimensions.
Should I Measure The Floor Or Walls?
Take measurements along the floor. Laser measures allow you to measure from wall-to-wall for greater accuracy.
How Do I Account For Uneven Walls?
Take multiple measurements and average them. Measure sections separately if the wall shape changes dramatically.
Should I Deduct For Baseboards And Crown Molding?
No need. Industry standard is to measure from wall-to-wall for the room’s total floor space.
How Do I Calculate The Area Of An Irregular Room?
Break the room into smaller rectangular sections. Measure and calculate each individually, then add them together.
Conclusion
Accurate room measurements are a vital skill with numerous applications, including real estate, design, and space planning. DIY enthusiasts can achieve precision with the right tools and methods.
Key tips: use quality tools, simplify complex spaces, account for obstructions, document dimensions neatly, and double-check measurements before purchasing.
These practices optimize interior spaces, saving time, money, and stress.